Showing posts with label Parties. Show all posts

Thursday, March 19, 2009

Welcome to My World!!!

Ultimate Blog Party 2009
Hello Ladies visiting from the Ultimate Blog Party! :)

I am glad to have you here...
You may recognize me as the first resident tackler from 5 Minutes for Mom. If you do remember me and you remember that tackle from the link I just shared you will want to see THIS ONE with the good news :). And you would also like to know that I am doing better than EVER!!!! :) I miss you guys.

If you don't know me from there I would still LOVE to get to know you!... Let me share a bit of my world with you :)

I am a stay at home mom with 3 little ones ages 4 and under. I am a born-again Christian living to learn more of God's love. I am a Scrapbooker, Card-maker, Altered-art faker and I love taking pictures! I even used to own my own business Scrapbooking for others till my third baby came around! I also like to play around designing my own blog backgrounds, I even have a FREE one HERE. I have been blogging over two years now and am loving it... I started my own Meme called My Walk Monday about a year ago actually to find and share encouragement in our walk with Christ... it really has been a joy to me.

And here are some of my other joys....
This is my hubby of 8 years and my oldest daughter...
This is my wonderful - yet very mischievous son...
And this is my littlest lady... :)

Oh and to be in the party spirit I would like to share one of the recipes that almost everyone asks me for because it is so easy to make... only 4 ingredients :)
  1. 1- 16oz. container of cool whip
  2. 1 - large can of crushed pineapple (drain before use)
  3. 1 - can of cherry pie filling
  4. 1 - can of regular sweetened condensed milk
Just stir it all together and put it in the fridge for a while before serving :) Enjoy!

Monday, June 02, 2008

and the winners are!!!...

From day 1... the winners of the Rusty Pickle make-n-takes are...


From day 2... the winner of the Season 1 of Gilmore Girls on DVD is...

  •  The Forgetfulone (she also wins a Rusty Pickle make-n-take as a bonus for her link)


From day 3... the winner of her choice of one digi-scrap kit is...

  • Caro753 @ Imaginea (she made a beautiful flower layout with Jess' paper :o)


From day 5... the winner of the "surprise" gift (a Rusty Pickle idea book) is...


From day 6... the winner of the S.E.I. memory book kit is...


From day 7... the winner of the Real Women Scrap book is...

  • Natalie @ Normal to Natalie - be sure to look for me in the book Natalie, I am quoted 3 times!  :o)


From day 8... the winner of the Stamp Set used for the Father's Day card is...


From day 10... the winner of the Party Book Kit is...

  •  The Forgetfulone (she linked and visited everyone from the Mr. Linky list!)


From day 11... the winner of the Travel Guide for Scrapbookers book is... 


From day 13... the winner of the Boogie Wipes Prize Basket is...


From day 14... the winner of the sample of grungeboard is... 


From day 15... the winner of The Organized & Inspired Scrapbooker book is...

Friday, May 30, 2008

The Fun can still continue!

The party is over ladies.

But you can still enter in the giveaways till TONIGHT AT MIDNIGHT!

The winners will all be announced in a couple days.

Thank you for celebrating National Scrapbook Month with me.

Hopefully I will still see you around...  otherwise I will TOTALLY miss you.

KIT!

Saturday, May 24, 2008

From my own challenges....

... from the Fabric Challenge on the 13th and Close to My Heart Challenge on the 18th here is what I have come up with :o) I hope you are inspired to try the challenges yourself.
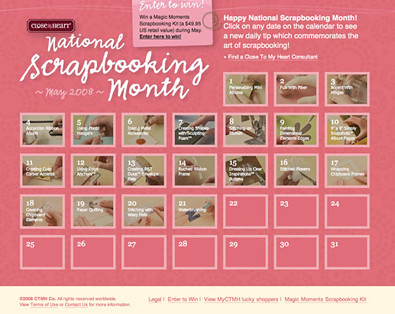
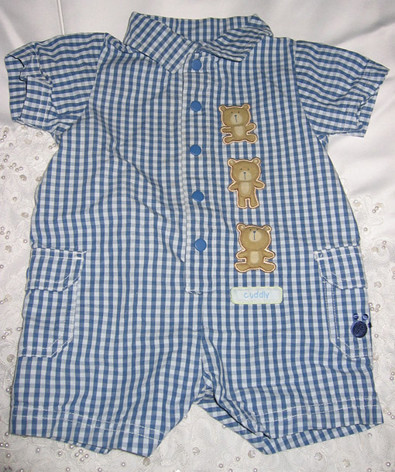
This one of my most favorite layouts yet, I have really been looking forward to scrapping these photos with my son's cute little 3 month outfit! I am happy that I also used some of the techniques from the Close to My Heart calendar...
And this post is the last one for our Scrapbooking Blog Party!

Friday, May 23, 2008

Yes - I had to show you...

... look! This grungeboard is so awesome! Yum, yumm, yummy!
Look I painted, sanded and inked it to make the texture stand out more! I almost looks like a cookie, lol.
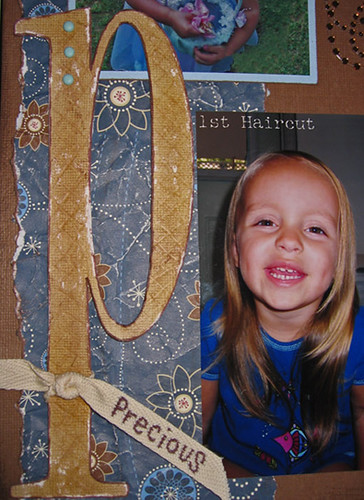
Here is one I covered with cardstock, rubbed with a stylus tool, inked, outlined and sanded.

THIS is the pack I bought :o)

This new product is DEFINITELY better than regular chipboard, but it does smell funny for a while... just a warning :o)

Look! - You'll want some too!

Thursday, May 22, 2008

Another Random Giveaway...

... from the 33 names on the Mr. Linky so far I am going to draw a random winner today!!!

You've won a Boogie wipes prize basket my dear!!!  :o)

Congratulations!

Wednesday, May 21, 2008

I made some new friends...

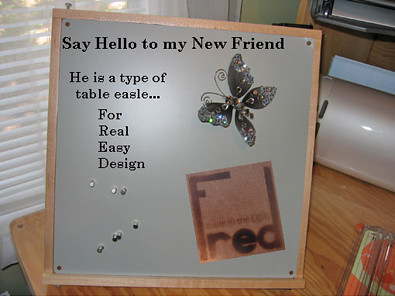
At first I didn't like him here, he was just sitting and staring, threatening my time and space, I even thought I didn't like his angle... but I was wrong... he ended up being a great helper!
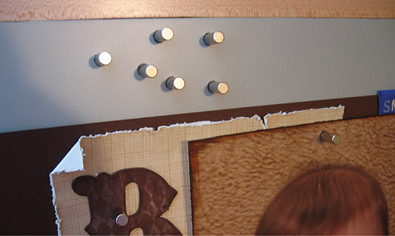
It was nice to have him holding the skeleton of my layout up to see from far away. I could make crucial design decisions and move things around a bit with the help of Maggie (the magnets), then pass it by some more to see if I approve the changes.
I could even remove Matt (the metal Mat) and set it aside (without my layout elements slipping around) and use Fred by himself to get things done in another room with the kids... see the little one in the background? I bounced her to sleep while I worked!
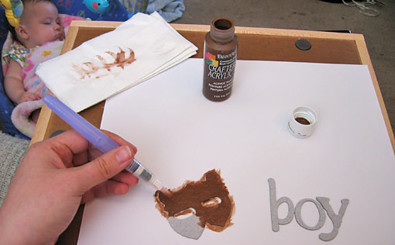
I must say Fred's angle was perfect. I tend to scrapbook sitting and standing at my desk and it worked well for both! It is a bit adjustable, but it doesn't not have multiple "locking" positions. I was also worried about Fred taking up too much space, but really he made more, I had plenty of room right in front of him to get my work done.
Matt and Maggie work awesome together! Maggie is strong, she even comes with felt pads (Patty? lol) to keep your elements safe. Matt is a gentleman also - he saves plenty of room above you layout for Maggie.
The craftsmanship of this product is above non other I have seen! It even matches beautifully with my handmade table :o) The arm to the stand locks nicely in the back when you don't want it propped up. Also there are clips on the top and bottom if you ever want to attach it to another Fred.

AWESOME! I was skeptical at first - but now I give it a 10 our of 10!

If you want more info on this spectacular product visit the FRED website at myscrappingbuddy.com.

Tuesday, May 20, 2008

A Review for you...

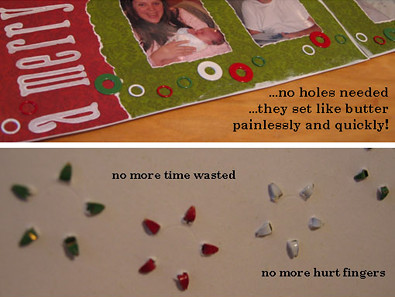
I LOVE it for the amazingly strong hole punches, the silence, the convenience and the versatility...
Yes it took some getting used to and was a little awkward at first, but it was TOTALLY worth it JUST for the quiet hole punches and for the gromment setting!
Looks like I have a new AWESOME hole punch - grommet setter! But I will be keeping this tool away from my soft eyelets!

Still worth it though - I give it an 8 out of 10.

Look HERE for a review video, and HERE to see the crop-a-dile original compared to the sequel :o)

Monday, May 19, 2008

"Linky Love" Game

The object of this game is to meet new friends and share the "love" (the linky love!)

  1. Visit as many party goers as you can from the Mr. Linky List.
  2. Comment on a couple of their blog posts (getting to know them).
  3. Then write a post on your blog linking off all the new friends you have made.
  4. Link back - to your linky love game post - in the comments here.

And win this...

Sunday, May 18, 2008

Close to My Heart Challenge

I know I am throwing all this out at you pretty fast... I have another challenge :o)
  • Use one or more of the techniques they are teaching daily this month
  • Share it on your blog
  • link back to this post in the comments

Saturday, May 17, 2008

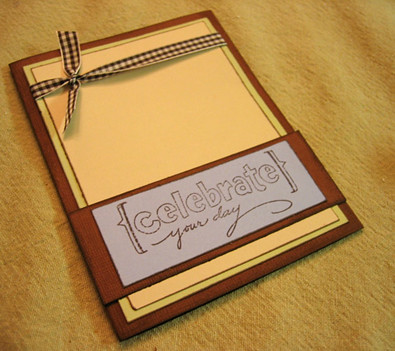
Stampendous Fathers Day Card

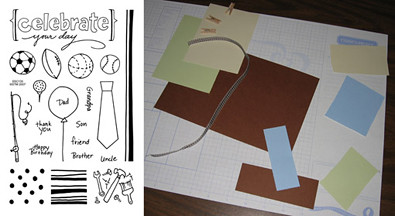
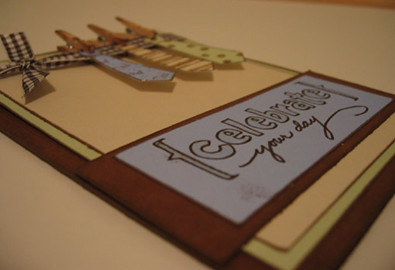
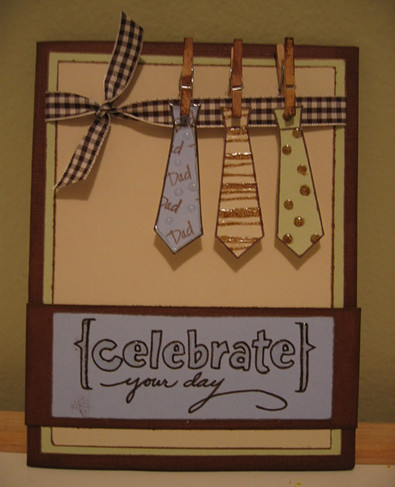
This tutorial was a design taken straight from Stampendous' stamp catalog... I just loved the card so much, I had to show you all how to make it!

Now get your supplies ready:


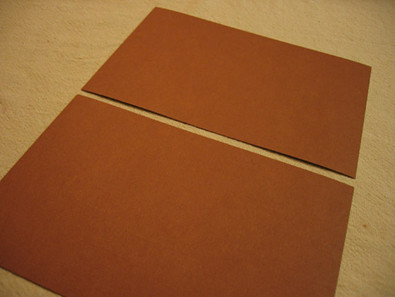
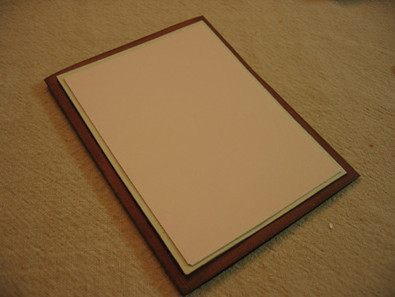
1. Take your main card color and cut it to 4 1/4 x 5 1/2" (mine is 8 1/2 x 11" cut in half).

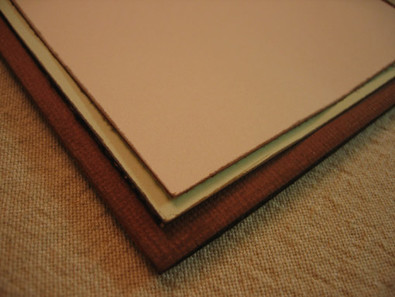
2. Fold it in half and ink the edges (I used nutmeg Bazzill and Chocolate CTMH Ink).

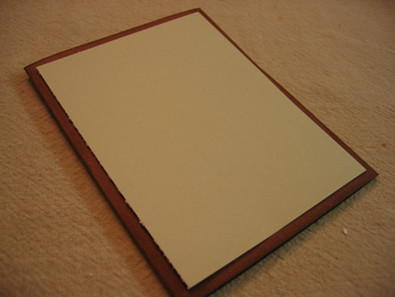
3. Take a second color and cut it just a bit smaller than your card (I used green at 3 7/8 x 5 1/8")


4. Take a third color and cut it smaller than your second (I used tan at 3 9/16 x 4 7/8")

* I am only telling you measurements after the fact, since I usually "eye ball" everything.


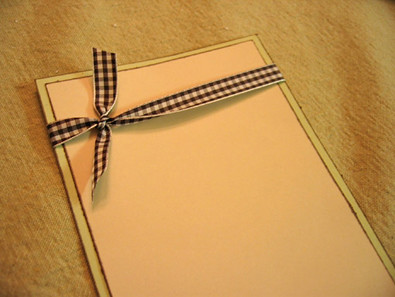
5. Be sure to ink your edges....

6. Take your second and third colors, adhere them to each other, then tie your ribbon to the top.

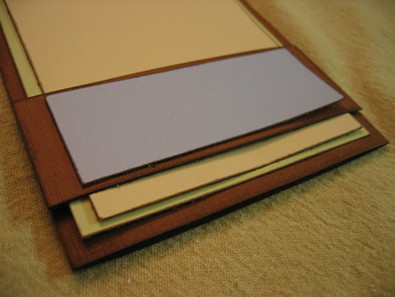
7. Cut a 1 1/2 x 4 1/4" strip and ink it for your title's mat.

8. Cut another strip with a new color to 3 9/16 x 1 1/4" for your title.

9. Stick all your papers down and Stamp your title.

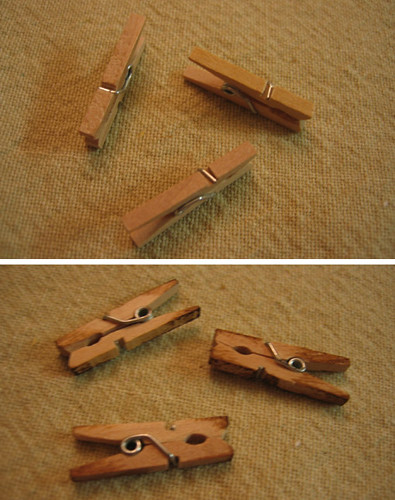
10. Take some mini clothes pins and ink them.

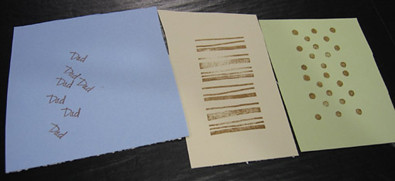
11. Take scraps of your three accent colors and stamp backgrounds on them like so.

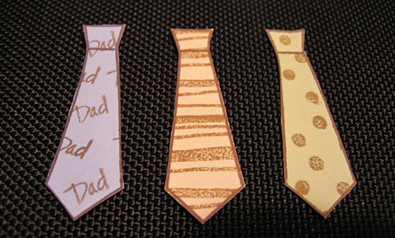
12. Then stamp the outline to your ties.

13. Cut your ties out with scissors.

14. Use the clothes pins to clip them to the ribbon at the top.

... And WAH LA! Cute isn't it!?

PS... you do not necessarily have to use this stamp set - this is a great design template for any theme, color or celebration... I hope to show you more cards in the future using this tutorial that have nothing to do with Fathers Day or stamping at all to show you the versatility.

Enjoy!

~ copywrite to stampendous ~

Friday, May 16, 2008

Keepin' it Real!

A confession from this mommy blogger! Today I will be keepin' it real. I had the fullest intentions of posting a product review that will now have to wait since I was just visiting a couple of my favorite blogs and ran into Tasra's!!!!

As you may or may not know I was a dancer throughout most of my Jr. High and High School years and can easily swoon (as Joshie says) over dance videos!...

... WELL!! Tasra had a YouTube video up for So You Think You Can Dance (which I've never seen because I don't watch tv) but I ended up sitting here watching video after video on YouTube laughing out loud and reminiscing over a wonderful past-time! Here is one of my favorites...

YES ladies! Even I lack planning, focus, balance, and boundaries... I exaggerate all too often and I make MISTAKES ALL THE TIME!

WAIT! Don't these sound like things we could have problems with in our Scrapbooking as well!!! Yep... and they are also the very things my friend Tasra shares about in her book Real Woman Scrap. It's amazing how she shows us different things we can lack in life, then she shows us the parallel in Scrapbooking! She has a fantastic gift for encouragement and shares practical ways to get us out of our real life crappy (excuse my language) and Scrappy predicaments.

Doesn't her book sound GREAT ladies... it is! Leave a comment here to win one and have a GREAT day!

Thursday, May 15, 2008

A Random Giveaway Today...

... from the 25 names on the Mr. Linky so far I am going to draw a random winner today!!!


Take a look at what you've won!!!  A 4x6 memory book kit from S.E.I.!  Enjoy!

Wednesday, May 14, 2008

My First Digi-Scraped Layout!!!

Okay ladies... if you were waiting around for today's post you can be sure it was all the fault of me working on this page (and this post) WAY too long! LOL! I hope you like it.

I got inspiration from so many different places...


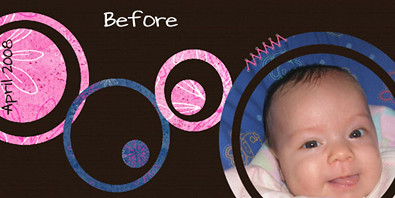
I also re-colored Jess' bright blooms paper in Photoshop by...

  1. Copying my photo as a layer onto the original
  2. Choosing Enhance from the top menu
  3. Then Adjust Color
  4. Then Replace Color
  5. Then using the Eyedropper Tool I picked the blue color out of the photo
    • This is why the photo has to be pasted in.
  6. I moved the hue, saturation, and lightness sliders around until I got what I wanted
  7. ... then I had a new color of paper to use!!! :o)
    • You can't do that it in handmade scrapping!


I also made the pink paper in my circles a bit lighter by...

  1. Selecting each circle of the color I wanted to lighten
  2. Going to the Style and Effects box to the right
  3. Choosing Layer Styles & Visibility
  4. Then I "ghosted" all of my pink paper.... mah ha haa :o)
    • Added to say: I like that I have the choice to just change it right back!


And (yes - there's more) I textured my brown background paper by...

  1. Selecting the layer that was my background paper
  2. Choosing Filter from the top menu
  3. Then Filter gallery...
  4. Then I chose Texture
  5. Craquelure
  6. I moved the sliders around accordingly
  7. Clicked OK and vah-lah!! - Texturized Paper!!! (Can you see it?)
    • Still can't feel it like you can Bazzill though :o)

Tuesday, May 13, 2008

A Layout Challenge!

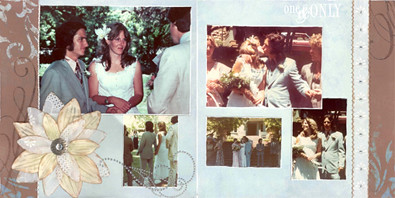
After seeing 27 dresses last night with my Joshie and getting my wedding dress out to take pictures of it I realized how precious clothing can be to someone. In the movie the younger sister was given her mother's wedding dress because she was getting married first, but she didn't like it, so she cut it up (or got it altered) to make it into something different!

The older sister totally hated her for cutting their mommy's dress apart, but I see the point the the younger sister had! She was still savoring the memory of her mommy's dress, it was just in an altered state! It still brought all the warm fuzzy memories, but in a different form.

So my challenge for you today is to take a special piece of clothing or fabric to you, and alter it by making it into a memory on your scrapbook page! Sound like fun? :o)

(Oh and please don't think that I am suggesting you cut up your wedding dress, or someone elses!! :o)

Here is a layout I made WOW probably 2 years ago or so where I used JJ's cute little jean shorts right in the layout to match my favorite jean jacket on her in the pictures... (I wasn't willing to cut the jacket up, so I cut her shorts instead to make the jacket stand out.)

I also used my client's ceremonial handkerchief on her layout months ago as a flower (on the left) and a sewn border (on the right), I had a whole half of it left that I tucked in between the layout and the page-protector. You can see a close-up HERE.
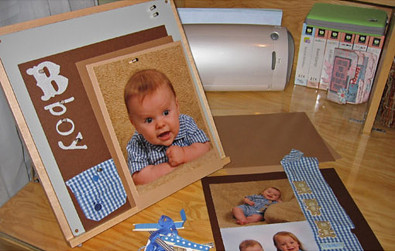
And here is the next special piece of clothing I have been saving ever since B.Boy grew out of it! It was TOTALLY my favorite on him!... and here are the pictures for that layout as well :o)
Stay tuned for the unveiling of this layout towards the end of the party :o) I can't wait :o)